I realized a long time ago that if you're going to build an airplane, or do anything that requires a lot of hours in the shop, you have to have an environment that's suitable. The bottom line for me is, if I'm not comfortable, it's not very motivating and I can lose my drive and enthusiasm very quickly. It's for this reason that I spent a lot of time before I ever started on this project getting my shop ready. My shop, or garage, was built as cheaply as the contractors could get away with back when this house was built. That meant it had open stud walls, a cement floor, a couple of light bulbs, and nothing more. That was it.
Doing a major home addition and a lot of home improvements gave me the skills and desire to fix up the garage a bit before starting my RV project. You should have seen my garage about 10 years ago. It had become a dumping ground and storage area for a huge pile of junk. It was stuff I didn't want to throw away, but I didn't have anywhere else to put it. You could hardly walk through this place. Many people must face this dilemma. So my work to improve my shop was driven out of necessity. I had to do something with this space if I wanted to use it effectively.
The solution for me was threefold. First, I sorted through all my belongings and ruthlessly got rid of stuff I probably wouldn't use. Second, my son helped me build a nice toolshed out back in the yard. I now have two sheds that I use to store all my yard and garden equipment and other stuff that is only used occasionally, or seasonally. It helped clear a lot of stuff out of the garage. Third, a kitchen remodel left me with a whole set of used, but conditionally okay, cabinets. Rather than haul them to the dump, I installed them in my garage. I also decided to build some nice storage shelves for all the remaining stuff that was to stay in the garage. This brings me to the open stud walls. Below is a "before" picture of my north wall.
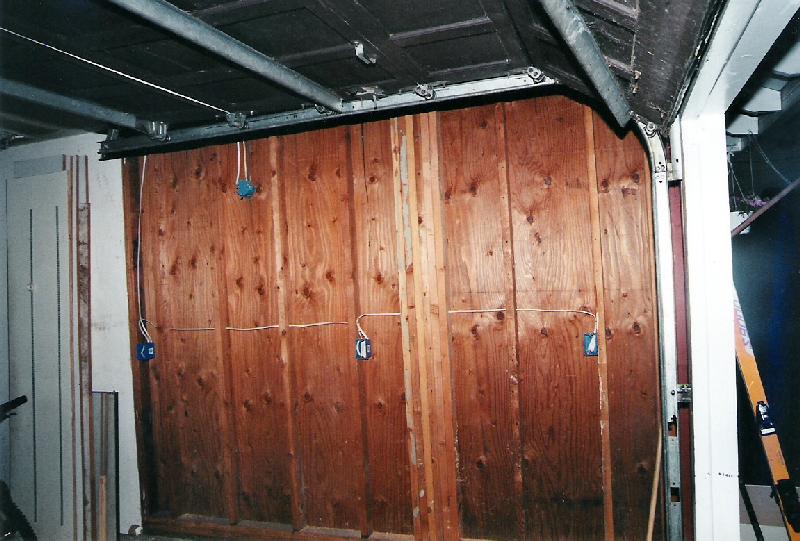
I decided to sheetrock these walls and finish them before building shelves. My main objective at the time was to finish the walls so I could paint them white. Good lighting was on my mind and I wanted to brighten it up in here. One of the smartest decisions I made was to insulate the walls first. Even though this is an unheated garage, I figured insulation was cheap. So why not install some before covering up the bare stud walls? Boy, am I glad I put in the insulation! Little did I realize at the time how much this would benefit me. Even without a heater, I can go out in the shop in the dead of winter when it's freezing cold outside and work. The temperature has never been below the mid-40's. And in the heat of summer, it's much, much cooler in my shop than it is outside. I have no air conditioner. So I bought insulation and installed it. But first, in the picture above, you can see another wise decision I made. I installed some electrical outlets all around the garage. There was nothing in this garage but an outlet or two on the west wall. I now have a convenient outlet available to me wherever I am and whatever I'm doing.
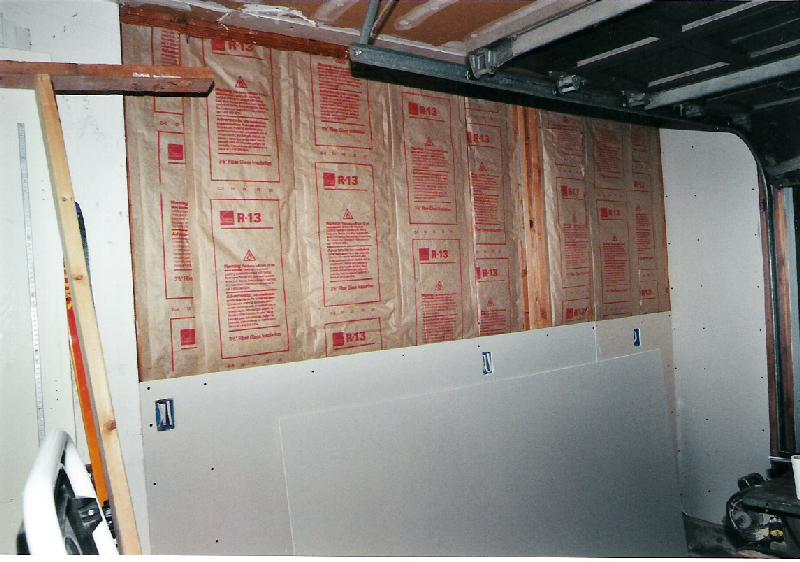
Here's that same wall, with the insulation installed and the last piece of sheetrock about to go up. This wall is now finished and painted, and bears a whole set of nice shelves, offering me a tremendous amount of storage area. A lot of items that used to either sit on the floor or on a table that I had out here can now be stored on the shelves. At the very top of the picture, if you look real close, you can see the original ceiling in the garage, as left by the contractors, unpainted. The sheetrock had turned dark from the many years of not being painted and exposed. This darkened ceiling and wood stud walls made it feel like a dark dungeon in here. So I finished and painted the ceiling a nice bright white, too.
Directly across from this wall, on the south side, is the other wall that was bare open studs. Below are a couple of pictures showing that this wall was also insulated, sheetrocked, finished and painted. In the upper left, you can also see some additional lights I installed. Shop lights are cheap, easy to install, and you can move them if you need to as your needs change. All these improvements, paint, and new lights really brightened up this place!
.jpg)
In the picture above, taken during construction of my wings, you can see the finished south wall, the old kitchen cabinets that I brought out and installed in the garage, and a standard EAA workbench on the left. I can move it around, but at this point it had become an extension of the countertop to the right, making a nice long work surface. And as you can see, it came in very handy! The light green countertop is simply a surplus sheet of thick shelving that came with the green formica surface already on it. I bought it at a local plywood store. It was cheap and all I had to do was cut it to length and put it on. The edge isn't finished, but hey, this ain't no fancy kitchen. My old kitchen cabinets are experiencing a second life, holding all kinds of tools, rivets, hardware, and tons of other small stuff. I don't know what I would do without them. I'm so glad I didn't throw them away!
.jpg)
This is a picture of my son, Daniel, helping me cleco the horizontal stabilizer together during construction of my empennage. I put this shot in because it's one of the best shots I have of the cabinets I installed, showing how they wrap around this corner of the garage. I built some simple shelves underneath, between the two drawer sections. There's a very nice place to store my shop vac, as you can see. I also installed a set of flourescent light fixtures under the upper cabinets. You can see how well they illuminate the work surface. I love this! This is no longer a dark, dingy corner of the garage.
One more subject I should mention is heat. Thanks to the insulation and finishing of the walls, it never gets below freezing in here. But still, the cold can get to you after a while. So I discovered the value of having a shop heater. I put together a separate page just on the subject of heaters, and you can read all about it here.
Is my shop perfect? Far from it! Nevertheless, all of these improvements have given me a place that's a pleasure to work in. It's well lit, and everything I need is in it's place. One of the great pleasures I find with this RV project is being able to reach for a tool when I need it, and I know exactly where it is. I no longer waste time hunting for things, wondering where I put them. Everything I need and use has a place to live. And my shop vac is always nearby. I have found this to be a most valued piece of equipment. I can just grab the hose and flip the switch to clean up. This has kept my shop neat and clean, and kept me from tracking aluminum shavings into the house, which would surely irritate my other half.
| Home|